Tips and Tricks
Xiaomi Gallery Tip: How to hide image with the password
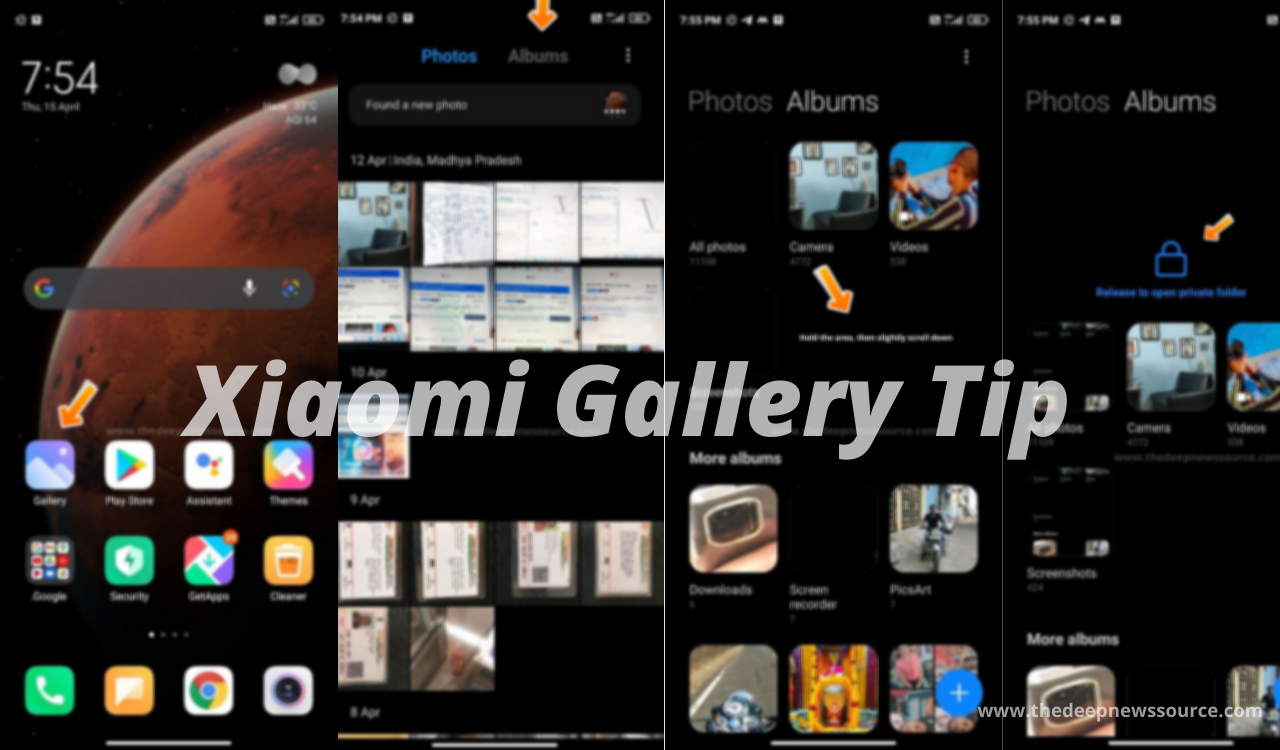
The phone’s gallery is an important application where we share all our images. All the smartphone manufacturers prepare their smartphone gallery according to their own and store many options inside it.
In that way, the Chinese tech giant Xiaomi has stored many options in the gallery of its smartphones and presents them in a very attractive way. Xiaomi gallery is a very popular application and it offers to hide the image inside it without using any third-party applications.
Although the gallery has provides a password option to users and it has a very secure feature compared to the other hide photos applications.
The best part of the Xiaomi gallery is great privacy where you can not record your screen as well as not take any screenshots. If you have taken the screenshots or record the screen video the image will show the whole blank area. Now let’s check how to hide your image inside the Xiaomi gallery.
Xiaomi Gallery: How to hide image with the password
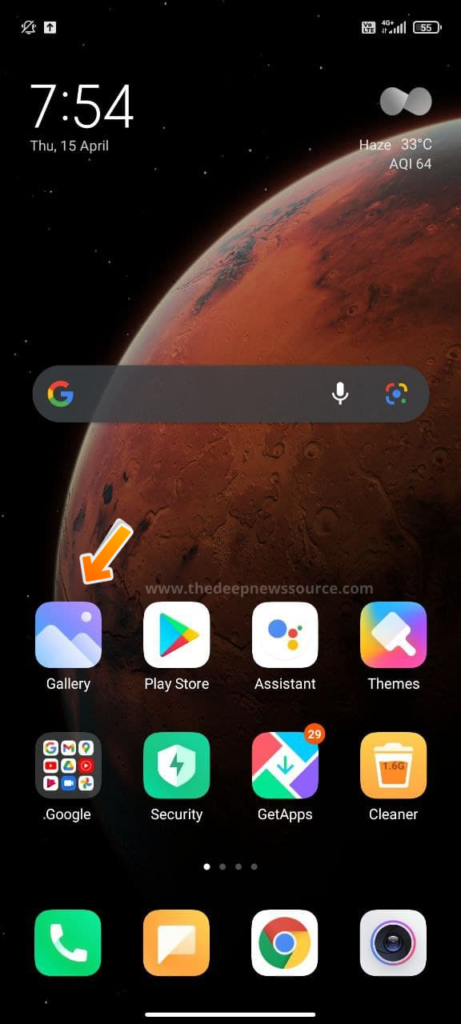
1. Open the Xiaomi Gallery application.
2. Select the Album option in your Gallery
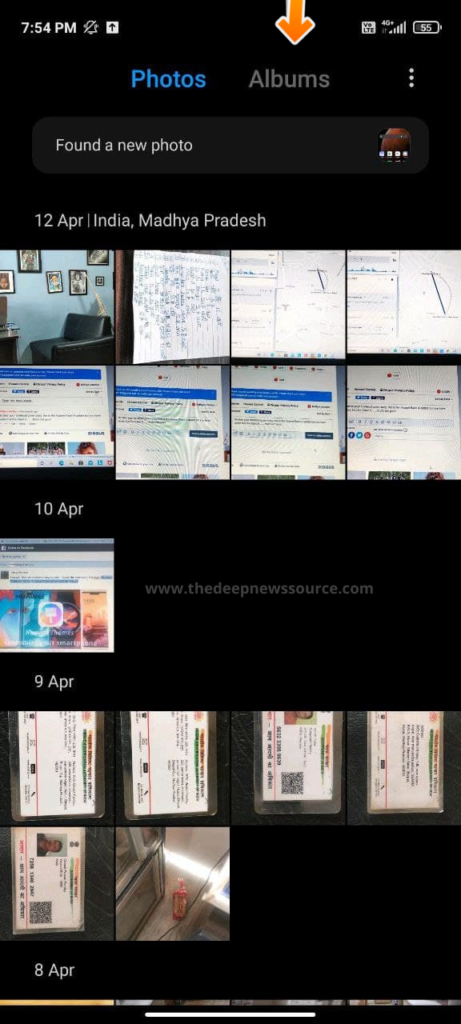
3. Hold the blank area, then slightly scroll down
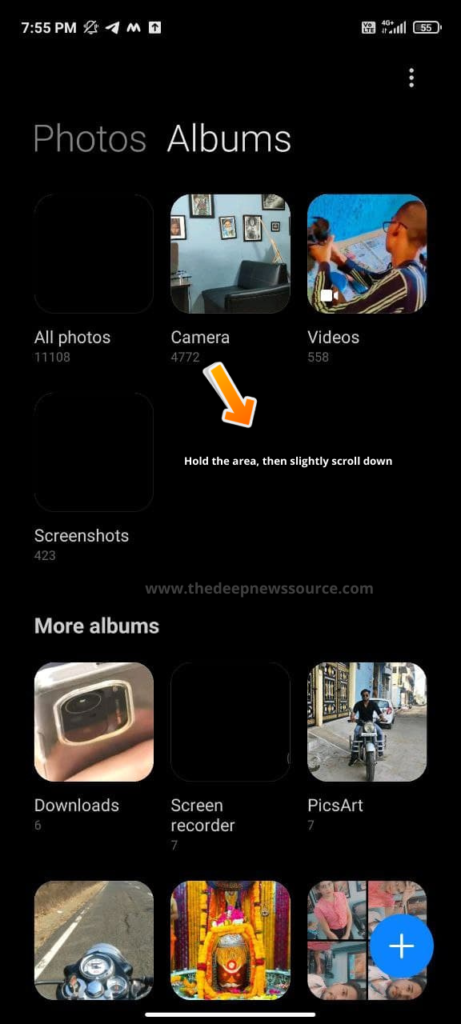
4. Now the hide application open in the upper center display with the name- Private folder
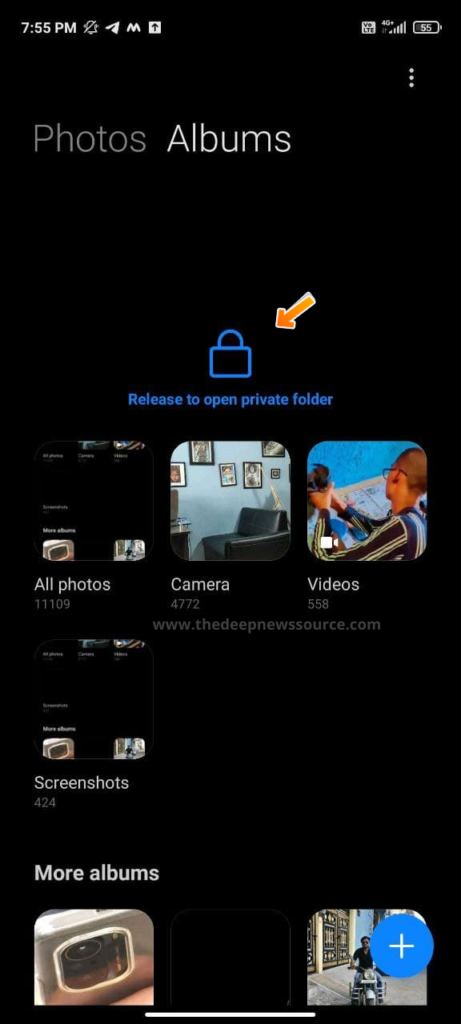
5. After this, do not back up the scroll and release your finger
- Note: Screenshot not available due to the privacy issue.
6. Now the Private folder opens in your display, then create your password.
- Note: Screenshot not available due to the privacy issue.
Xiaomi Gallery: How to send image in the Private folder
1. Open the Xiaomi Gallery application.

2. Then press the image which you want to send to the Private folder
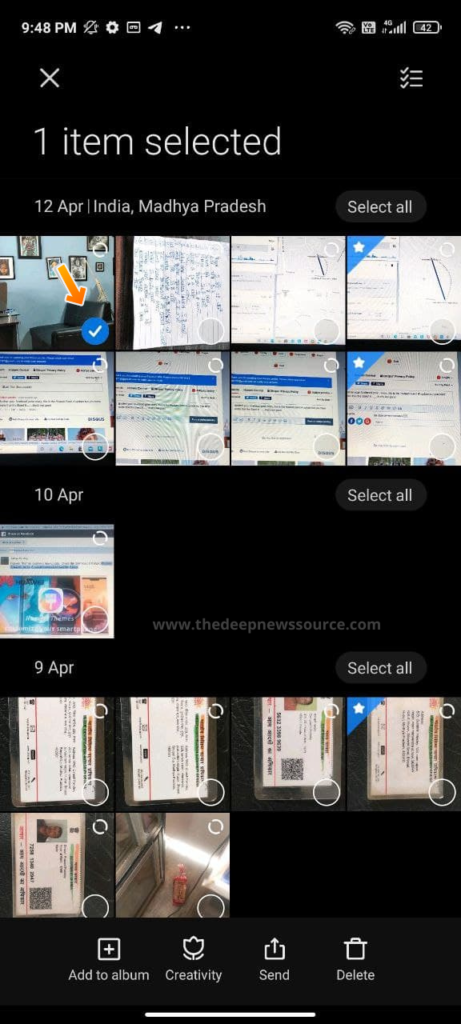
3. Select the Add to Album option
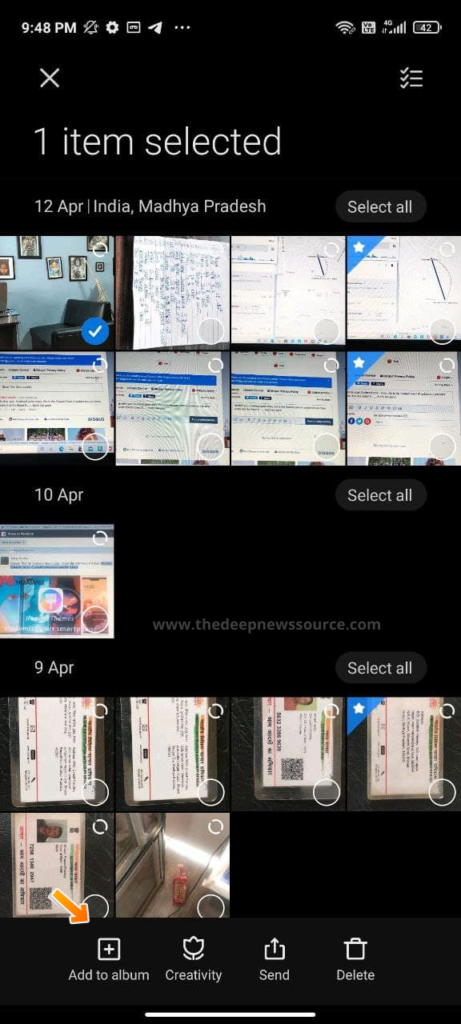
4. Then select the Private Album option
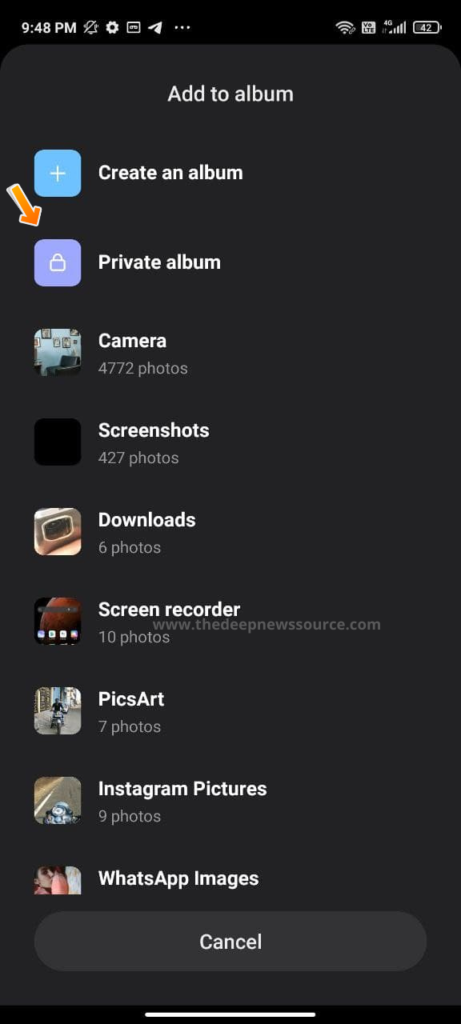
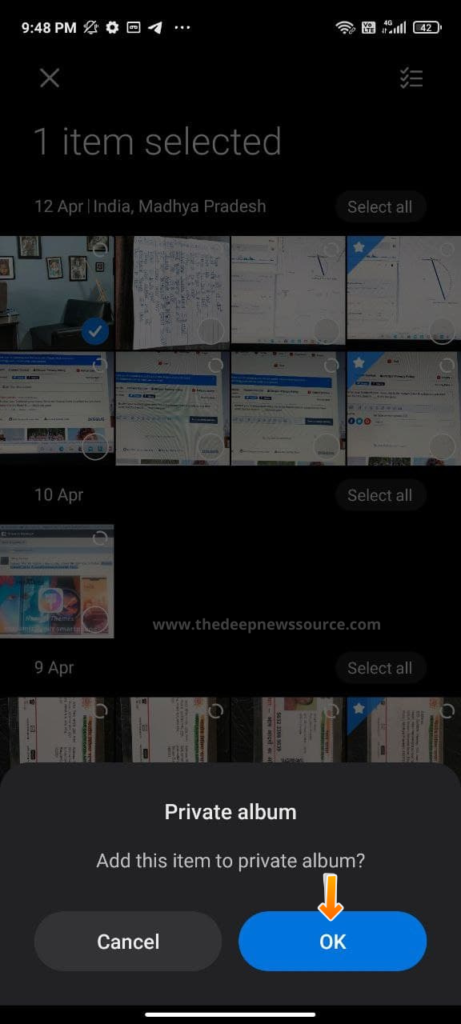
5. After that, you have received the pop-up in your display, select the OK option and send the image in the Private folder.
Note: You can also see all the information related to it through the screen record video, which we have mentioned at the end of this article.
Xiaomi Gallery: How to hide image with the password (Check the video)
Xiaomi Gallery: How to send image in the Private folder (Check the video)
IF YOU LIKED OUR ARTICLE, YOU CAN FOLLOW US ON OUR GOOGLE NEWS AND TELEGRAM CHANNEL ALSO YOU CAN JOIN OUR DISCUSSION GROUP ON TELEGRAM.
Tips and Tricks
Download Typing Tutor 6 Free or Windows 7/10/11 [Download Link]

Today we are giving information about such a free software which will help you to learn typing quickly, the name of this software is Typing Tutor 6, by downloading it you can improve your typing skills.
As important as the keyboard is for computer typing, typing software is equally important. Good typing software is not only good for you to learn typing and type different languages, but also provides a good user experience.
Typing Tutor 6 is a good software to improve your typing, if you are in the beginner stage of typing then it will prove to be very useful for you to improve your typing with a good experience. But experienced typists looking to up their speed may be disappointed by the program’s updated interface. The program consists of a series of text that scrolls through the screen as the user types.
Users can choose from text consisting of letters, capital letters, numbers and symbols, or text of their choice. As each text scrolls by, a keyboard diagram shows an outline of hands moving to the appropriate key. The user does his typing through the text available on the screen. And finally, the user can see the result of his/her typing speed, accuracy and timing. And also a score is also shown to the user in Typing Tutor.
How to Download typing tutor 6 free: Click on the download link and save the file and install
Typing Tutor 6 Free Download for Windows [64-bit] 7/10/11 [Download Link]
Download File:- Typing_Tutor_6
Typing Tutor 6
Typing Tutor 6 can prove to be a great addition to the users who take your typing to the next level with a variety of typing contests to choose from.
If you are preparing for typing by targeting government exam cpct or ccc, then you should use it. Typing Tutor 6 allows users to look no more than a few characters ahead. And since scroll speed depends on the speed of typists, who are already fast enough, they find that text flying across the screen is difficult to process with blurred vision. Which is very good from the point of view of your exam.
iOS 16
Tips and Tricks: How to unlock the iOS 16 Lock Screen after forgetting the Password
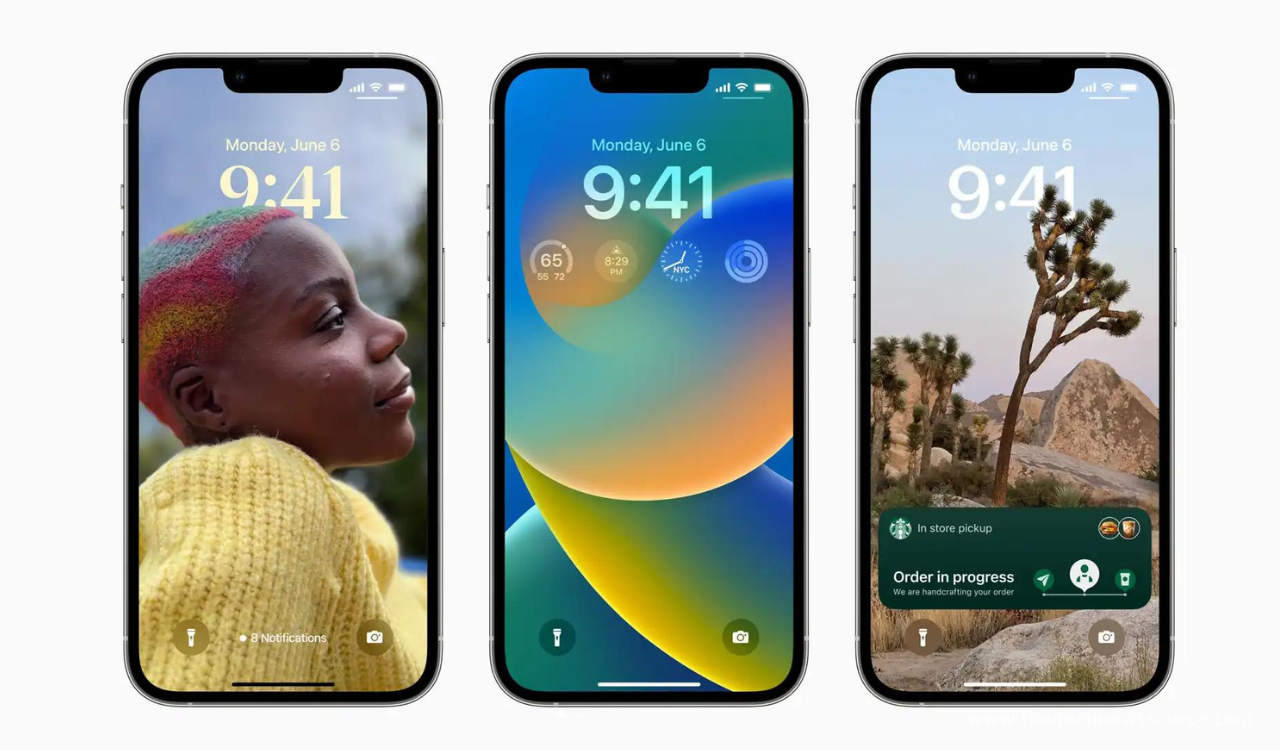
Apple released its upgraded iOS version – iOS 16 – to all eligible devices at the iPhone 14 series launch event. iOS 16 is now available for download on the iPhone 12 and 13 series. After you download the latest system, you will notice a new user interface, new screen animation, and other improvements. Also, if you forget your iPhone screen lock password with iOS 16, don’t worry; it’s simple to recover.
So, without further ado, let us now explain how to unlock your iOS 16 lock screen password when you forget it.
How to unlock the iOS 16 Lock Screen:
Tenorshare 4uKey has created an unlock iPhone solution that enables users to easily regain access to their iPhones. Firstly, you can check this software and install it on your PC. After that, proceed to the next step, which is listed below.
- To begin, download and run the Tenorshare 4uKey software.
- Connect your iPhone to the computer.
- To unlock the iOS screen and download the firmware package, press the “Start” button.
- Click the “Start Remove” button to begin unlocking your iPhone.
- With a few taps, you’ll have access to your iPhone.
For more information, you can visit the Tenorshare 4uKey website:
Cost and Eligibility:
Tenorshare 4uKey is now available for macOS Monterey as well as Windows 7/8/8.1/10/11. On the other hand, it is compatible with all iPhone/iPad/iPod Touch models running the most recent iOS version.
- The current price for a 1-month license for Windows users is $35.95.
For the more latest news, you can follow us on!
1. Telegram.
2. Google News.
3. Twitter.
News
On the Galaxy Watch 4, how do you switch between Google Assistant and Bixby Voice?
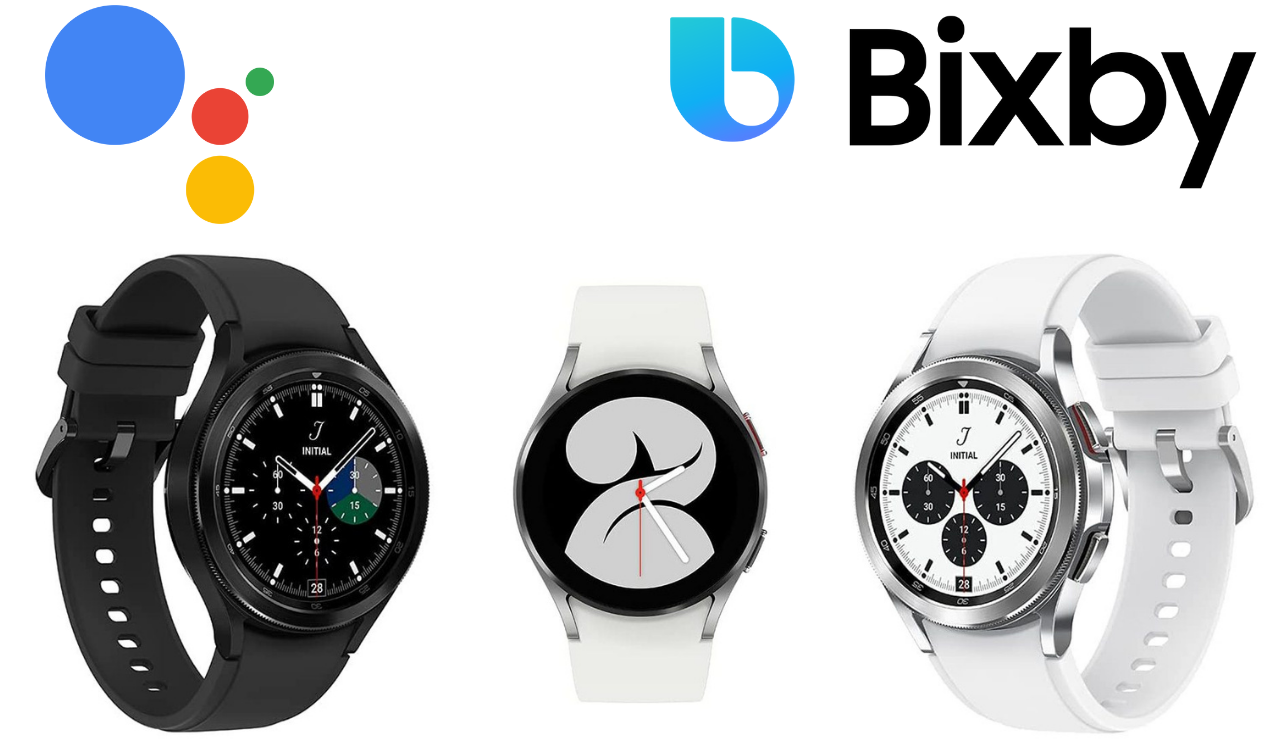
The Google Assistant app for the Galaxy Watch 4 and Galaxy Watch 4 Classic has just been launched by Samsung. Currently, the company only offers this application to a few nations, but that number will grow in the near future. Before Google Assistant, Samsung’s Wear OS 3 smartwatches had the Bixby Voice capability pre-installed.
Users of Samsung’s Galaxy Watch 4 series will be able to pick between the Google Assistant and Bixby Voice with the debut of the Google Assistant. Additionally, both Assistants can now collaborate on the Galaxy Watch 4 series. You may utilize these apps just like the Galaxy smartphones: say “Hi Bixby” or “Hey Google” with your Galaxy Watch 4 and your Assistant will continue to function for you.
You can also use it without using your voice by pressing and holding the home/power button, but bear in mind that only the voice assistant you have set as your default will operate in this situation.

For the latest news, join us on our telegram channel: link below
 On the Galaxy Watch 4 or Galaxy Watch 4 Classic, how do you change the voice assistant attached to the home button? Simply follow the steps below to get started:
- On your Galaxy Watch 4 or Galaxy Watch 4 Classic, open the app drawer.
- Open the app Settings.
- Scroll down to the Advanced features option and tap it.
- Choose Customize keys.
- Select your desired assistant from the drop-down menu. Hold down the button.

By pushing and holding the home/power button, you may now start a voice search on the virtual assistant of your choice. If virtual assistants aren’t your thing, you may use the steps above to assign the long-press action to the power off the menu and rely on calling out the correct term when you need to use Assistant or Bixby voice search.


